Alight Motion is one of the most popular mobile apps for editing videos and creating animations. It’s packed with tools that let you design eye-catching content, even if you’re just using a phone. One powerful tool inside Alight Motion is called the clipping mask.
This feature is often used by editors to blend videos, add creative shapes, or control where effects appear. If you’re new to editing or just curious about clipping masks in Alight Motion, this article is for you. We’ll break everything down step by step—no confusing terms, just simple and clear instructions.
What is a Clipping Mask?
A clipping mask is a feature that lets you control how one layer is shown by using another layer as a shape or boundary.
Here’s a simple way to understand it:
- Imagine placing a photo behind a shape, like a circle.
- You only want the photo to show inside that circle—not outside.
- A clipping mask lets you do that!
In Alight Motion, the top layer becomes the mask, and the bottom layer is clipped to fit the mask.
This is super useful when you want to:
- Show a video inside a shape (like a star, heart, or letter)
- Create text with video playing inside it
- Blend multiple effects in one scene
- Add animation only to a certain part of an object
Why Use Clipping Masks in Alight Motion?
Here are some cool things you can do with clipping masks:
01. Video Inside Text
You can place a video or animation inside large text. This looks great for intros or title screens.
02. Shape Reveals
Want your video to appear only inside a circle or triangle? Use a shape as the mask.
03. Stylish Effects
Add light, texture, or glitch effects only to a certain area—like a person’s face or object—without affecting the whole screen.
04. Creative Transitions
You can make a mask animate, so a video shows up or disappears in a cool way.
How to Use Clipping Masks in Alight Motion
Let’s go through the steps. It’s easier than it sounds!
Step 1: Open Alight Motion and Create a New Project
- Tap the “+” button to start a new project.
- Choose your resolution, frame rate, and background color.
- Hit “Create Project”.
Step 2: Import or Add Your Layers
- Tap the “+” sign again.
- Choose Media to import an image or video.
- This will be your clipped layer (the content you want to show inside the shape).
Step 3: Add the Mask Layer
- Tap “+” again and select Shape or Text.
- This is your mask layer—the shape that controls how the bottom layer will appear.
Important: The mask layer must be on top of the layer you want to clip.
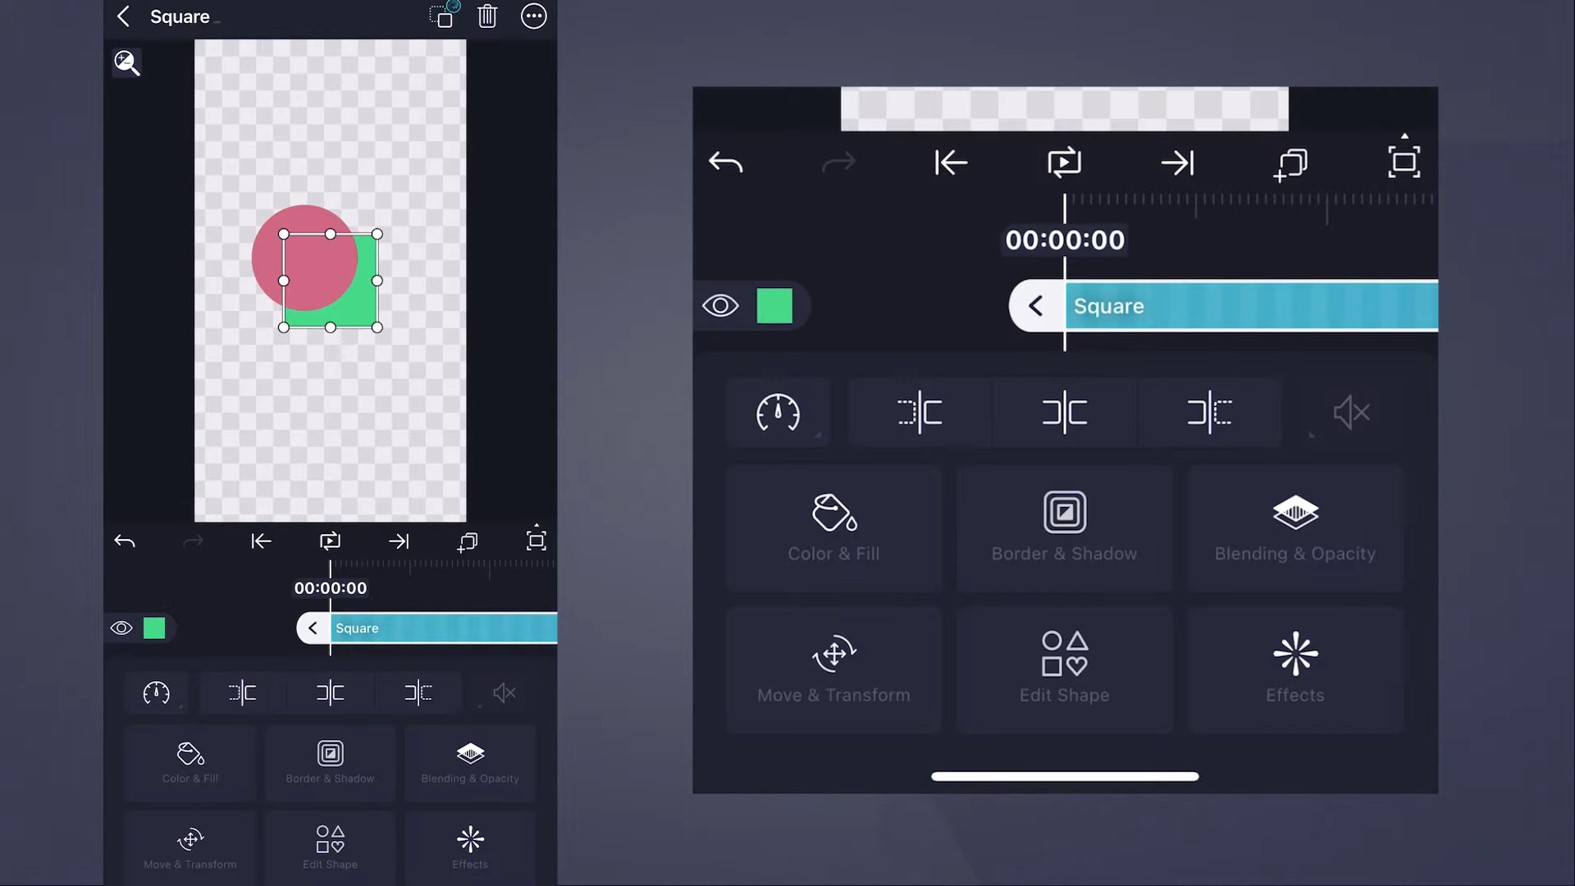
Step 4: Enable Clipping Mask
- Tap and hold the mask layer.
- Drag it above the content layer.
- Now, tap the content layer (bottom one).
- Look for an option called “Clipping Mask” and toggle it ON.
You’ll now see that the bottom layer is only visible within the shape or text on top. That’s your clipping mask in action!
Example Projects Using Clipping Masks
Let’s explore a few fun ideas you can try:
1. Text Mask with Video Background
- Add big bold text like “TRAVEL”.
- Put a fast-moving beach or road trip video underneath.
- Use the text as a clipping mask. Now, the video plays inside your text!
2. Face Reveal with a Shape
- Add a portrait photo.
- Put a moving circle on top.
- Use the circle as a clipping mask, and animate its position to reveal the face gradually.
3. Multiple Masks for a Collage
- Use several shapes as masks over different images.
- Clip each image to its shape.
- Now you have a stylish photo collage with smooth animation.
Tips to Get the Most Out of Clipping Masks
01. Use Bold Shapes or Fonts
Thin text or small shapes can make your mask hard to see. Go for bold fonts and solid shapes for better results.
02. Combine with Animation
Make your mask move, scale, or rotate. It adds extra energy to your edits!
03. Use Layers Wisely
Keep your mask layer directly above the layer it affects. If it’s in the wrong place, the clipping mask won’t work.
04. Experiment with Blending Modes
After using a clipping mask, try blending modes to create cool light or overlay effects.
Common Mistakes to Avoid
Mask on the Bottom
If your mask layer is below the content layer, the clipping mask won’t work.
Not Enabling the Mask
You have to turn on the clipping mask option from the layer settings. Just stacking layers isn’t enough.
Forgetting to Group
If you want to move or animate both layers together, group them after applying the mask.
Is Clipping Mask the Same as Alpha Mask?
In Alight Motion, there’s also something called an Alpha Mask. It works a bit like clipping masks but uses transparency instead of layer shapes.
- Clipping Mask: Uses one layer to define the visible area of another.
- Alpha Mask: Uses transparency (alpha channel) from one layer to cut through another.
For most creative projects, the regular clipping mask is easier and more visual to use.
Final Thoughts
Clipping masks in Alight Motion are simple but powerful. Whether you want to create text effects, shape reveals, or stylish intros, this feature can add a professional touch to your videos.
With just a few taps, you can turn a plain video into something eye-catching and unique. It’s all about experimenting with shapes, movement, and layers.
So the next time you open Alight Motion, try adding a clipping mask to your project—you’ll be surprised how much it can level up your edits!